Showing posts with label upcycle. Show all posts

Saturday, May 10, 2014

It's Embarrassing

... what our dining set looked like until a week or so ago.  It really is.  It was bad.  It didn't start it off bad.  I'm fairly certain it's circa 1980-something based on the style and the fabric on the chair seats.  I got it from my parents when I moved to my first apartment in 2002; they purchased it for me secondhand.  It was actually in great condition at the time.  Not totally my style as furniture goes, but in my first apartment with a huge, empty eat-in kitchen, "free" and "gift" were very much my style.


Over the years, there was obviously some wear and tear, especially on the fabric.  Most happened in recent years, though, after Eric and I got married.  Having three cats who loved sleeping on the very nubby, very loose-knit fabric created a situation where I didn't want my guests sitting on the chairs, which had become completely interwoven with cat hair.  And then at some point, something spilled on a chair.


And we'd been using the table to make soap and candles, and the overspill of molten soap and essential oils had marred the surface.  Also at some point, someone (*cough* Eric) left something on the table that leaked and caused water damage to the wood.


I grew to hate that dining set.  Despise it.  It made me scowl every time I looked at it.  Scowling isn't a great look for me.  People get intimidated.

So it was long past time to refinish it.  Since both Eric and I pretty much hate painted wood, the natural solution was sand and stain.  Lots of sanding.  Using quite a few belts and even more squares of sandpaper.


Have I mentioned sanding kind of sucks?  Especially when the damned chairs don't come apart and they've got rounded bits and close-together bits and a bunch needs to be done by hand?  It took for-freaking-ever.

Boo for sanding.

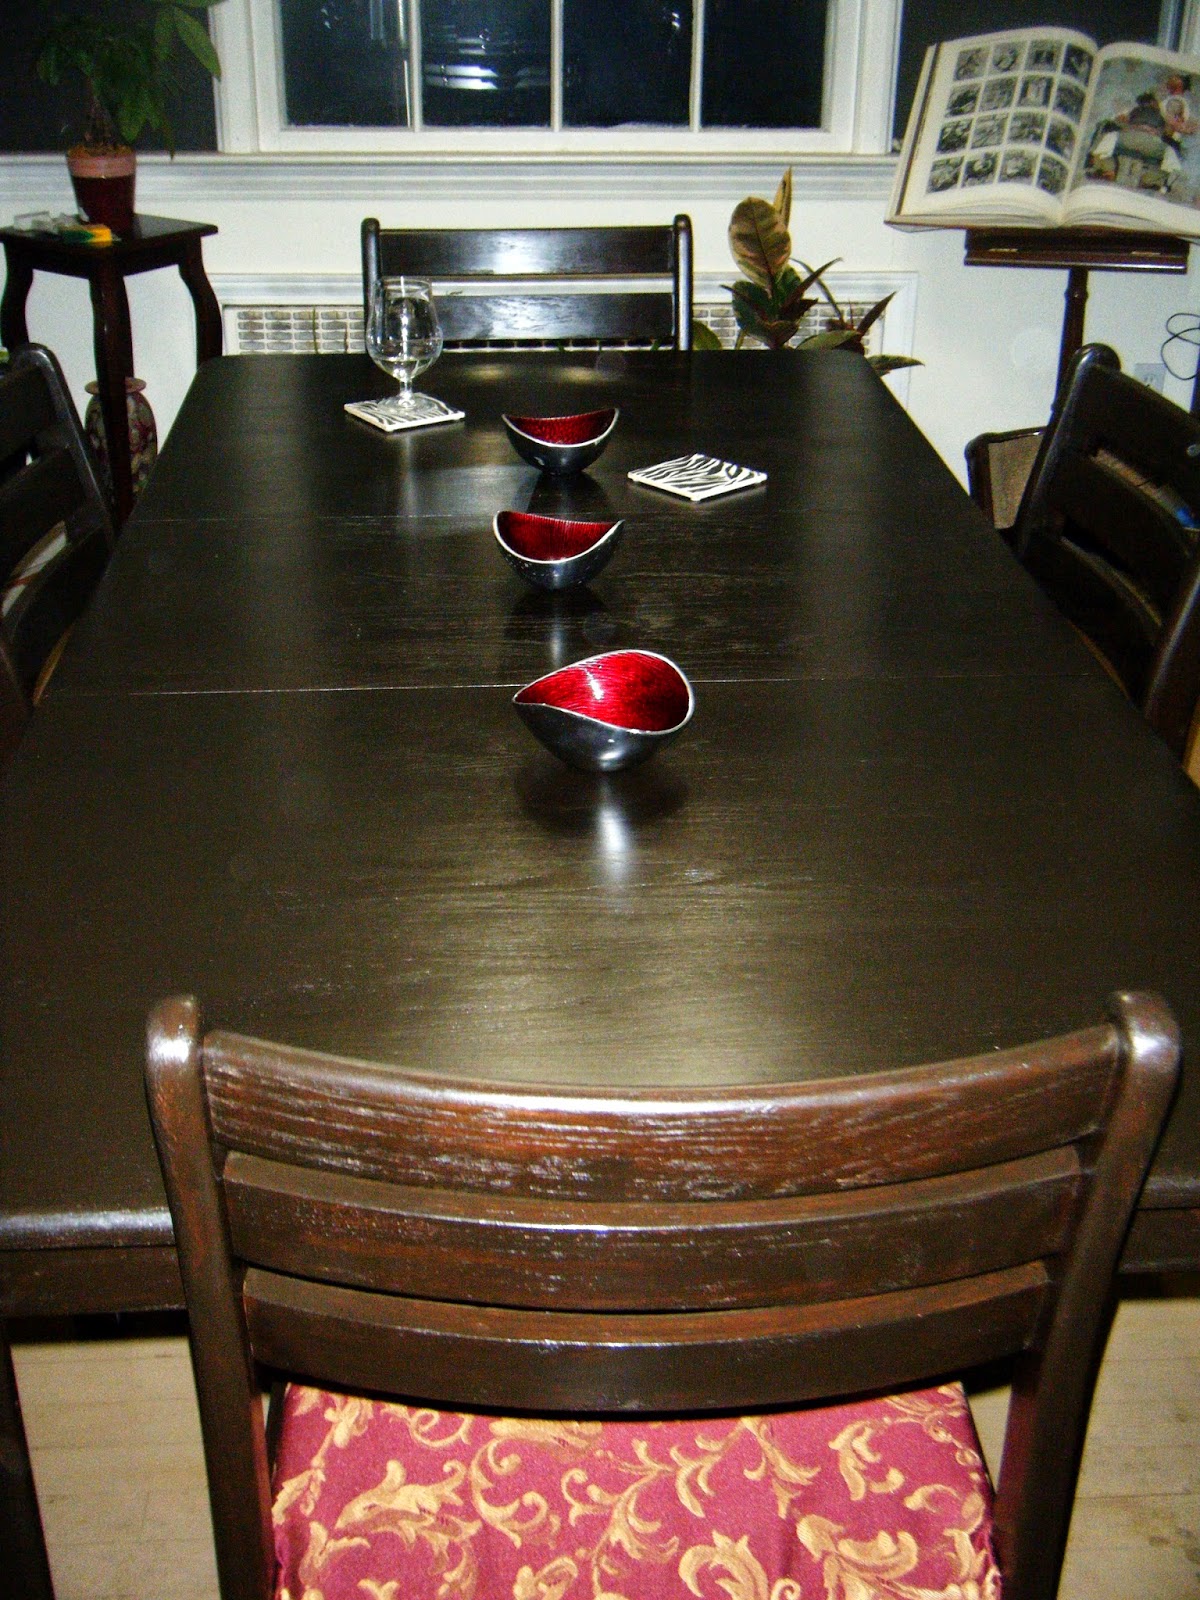
On the other hand, yay for staining.  We decided to go with a much more modern and formal "Kona" stain that's not black, but a very, very dark brown, dark as night.

A good coat of polyurethane, and that was done!

In the meantime, at night when I couldn't be outside sanding due to chill and lack of light, I was inside reupholstering.  I've never reupholstered a single thing in my life before!  Had to make new cushions too.  Personally, I think I did a damned good job.  We chose an also formal fabric that we ordered from JoAnn.com.  They didn't carry this particular fabric in store, but did you know you can order a swatch of their online fabrics for $3?  We discovered it while fabric shopping, and it's a stellar idea.  In this particular instance, we discovered that we loved it even more in person than online.


Seats back on the chairs, and all done!  The set was all ready for our Kenucky Derby Party!


Shared with:

Simply Sweet Home Friday FavoriteDragonfly DesignsSimply Sweet Home Friday Favorite ”Craft Read more at http://www.turningclockback.com/2014/05/craft-frenzy-friday-link-party-4.html#iXDsX5ig02KdxHoe.99

Sunday, November 27, 2011

Handmade Holidays

Now that it's post-Thanksgiving, it's OK to talk winter holidays:  Chanukah & Christmas... and my nephew's December 22nd birthday.  I've been working on gifts.  First, these numbered beanbags.


For the front fabric, I used a pair of old corduroy pants.


For the fabric backs, I used fabrics from all different sources.


For instance, the sharks, monkeys, pawprints, and dinosaurs came from JoAnn Fabrics and were purchased for projects like this.  The motorcycles and planes were from a little mom & pop fabric shop nearby.  The red swirly fabric I bought over a year ago to back a quilt kit I never made.  And the two striped ones are old shirts of mine.


Then I did numbers to match the backs.


Once I had a stack of parts, I needed to iron on the number appliques.


Then I sewed around the appliques.  These, for the record, were my first-ever appliques.  For those of you who are really beginner sewing types like I am, some things I learned:

Sewing that damned zigzag around an applique is hard.  Seriously.  Of course, it got easier most of the way through when I realized that the little notch line on my sewing machine foot was the center line of the stitch.  Yeah.  I'm a little... rather than dim, we'll call it not observant.  So before that, it was really hard to keep the stitching on the edge of the numbers and I had to rip some out and redo them.  Honestly, even after I figured that out it was hard.  Stitches are as big as they are, and I'm still working out how to gauge getting the stitches where they need to be when it's time to turn the fabric.  Speaking of which, the tutorial is not kidding about the slowness and futziness of the sewing of the appliques.  Slow.  And futzy.

In the end, they came together.  How cute are these?


I've got the beginnings of another set in green for the other nephew, but first I have something else I'm working on.  It's something I've never done before and involves my very own patterns.  You'll see soon!

These beanbags, though, are now available for purchase in the Reef Botanicals Handmade Artists Shop.

Shared with:

Chic on a Shoestring DecoratingPhotobucketA Little Knick KnackDesigner Garden Keeping It SimpleBWS tips buttonSumo's Sweet StuffTip Junkie handmade projectsTodays Creative BlogHOGFun Stuff FridaysDragonfly Designs
Related Posts with Thumbnails